Installation Guides
Installation Guide
Following are Manual installation instructions
ICTFax Installation
ICTFax is a unique and complete solution that features mass faxing. Email to Fax, Web to Fax, Fax to Email, and Fax over IP server with ATA / Rest API support
1. Install Basic System Requirements
- Redhat 8 | Redhat 9 | Centos Rocky Linux8 | Rocky Linux9 | Centos 9 | Centos 8 |Centos 7 | Amazon Linux 2
- Apache 2
- MySQL 5 | MariaDB 10.3.28 | MariaDB 10.11.10
- PHP 5.3.3 | PHP 8.3
- ICTCore
- Sendmail
- FreeSWITCH
Install ICTFax Version 6.0
Please follow the steps below to install the ICTFax latest version 6.0
Install the MariaDB 10.11Create mariadb 10.11 repo. Add the following code into this file vi /etc/yum.repos.d/MariaDB.repo
[mariadb]
name = MariaDB
baseurl = http://yum.mariadb.org/10.11/rhel9-amd64
gpgkey=https://yum.mariadb.org/RPM-GPG-KEY-MariaDB
gpgcheck=1
Install required dependencies
sudo dnf install perl-DBI boost-program-options socat -y
sudo dnf install boost boost-program-options -y
Install the Perl module and its dependencies
sudo dnf install perl perl-CPAN -y
sudo cpan Sys::Hostname
Install the MariaDB
sudo dnf install MariaDB-server MariaDB-client --disablerepo='*' --enablerepo='mariadb' -y
Install Remi-repo & Epel-repo
sudo dnf install epel-release -y
yum install dnf-utils http://rpms.remirepo.net/enterprise/remi-release-9.rpm
Enable the PHP Remi 8.3
sudo yum module reset php -y
sudo yum module enable php:remi-8.3 -y
Install the Okey repository for FreeSWITCH
dnf config-manager --enable crb
wget http://repo.okay.com.mx/centos/9/x86_64/release/okay-release-1-10.el9.noarch.rpm
yum install okay-release-1-10.el9.noarch.rpm
dnf install task-freeswitch
Install ICT-Release Repo for installing ICTCore and ICTFax
yum install https://service.ictinnovations.com/repo/8/ict-release-8-5.el8.noarch.rpm
Install ICTCore
yum install ictcore ictcore-fax ictcore-email ictcore-voice ictcore-freeswitch
Install ICTFax
yum install ictfax
Install Other Dependencies
yum install php php-fpm php-gd php-mysqlndInstall Imagicyum install -y ImageMagick ImageMagick-develsudo yum install -y php-imagick echo "extension=imagick.so" > /etc/php.d/imagick.iniInstall mcryptyum install --enablerepo=epel php-devel php-pear libmcrypt libmcrypt-devel pecl install mcrypt echo 'extension=mcrypt.so' > /etc/php.d/mcrypt.iniInstall imapyum install php-imap -y
Configure the document root in apache “/usr/ictfax”
Uncomment “LoadModule mpm_prefork_module modules/mod_mpm_prefork.so” and comment this line “LoadModule mpm_event_module modules/mod_mpm_event.so” from this file /etc/httpd/conf.modules.d/00-mpm.conf
Change PHP_ADMIN_VALUE open_basedir line into /etc/httpd/conf.d/ictcore.conf
SetEnv PHP_ADMIN_VALUE "open_basedir = /usr/ictcore/:/usr/bin:/bin:/tmp/"
Disable selinux
setenforce 0
Restart the apache service
Restart php-fpm service
service httpd restart
service php-fpm restart
Install the ictfax database
CREATE DATABASE ictfax;
USE ictfax;
GRANT ALL PRIVILEGES ON ictfax.* TO ictfaxuser@localhost IDENTIFIED BY 'plsChangeIt';
FLUSH PRIVILEGES;

source /usr/ictcore/db/database.sql;
source /usr/ictcore/db/email.sql;
source /usr/ictcore/db/fax.sql;
source /usr/ictcore/db/ictfax.sql;
source /usr/ictcore/db/voice.sql;
source /usr/ictcore/db/data/role_user.sql;
source /usr/ictcore/db/data/role_admin.sql;
source /usr/ictcore/db/data/demo_users.sql;
exit;
Open the file /etc/ictcore.conf and find out the [db] section and replace user, password and database name in the following lines:
user = ictfaxuser
pass = plsChangeIt
name = ictfax
cd /usr/ictcore/bin/sendmail
./email_to_fax
Now visit http://yourdomain/ictfax
Default Username: admin@ictcore.org
Default Password: helloAdmin
Log in by entering the default admin and password, which we provided you. Go to the administration panel, which is placed on the bottom of the side bar on left. Create a new user or edit the existing.
You can configure providers and accounts too. For further details visit Admin guide.
Configure the email-2-fax and fax-2-service, following the guide “4. EMAIL TO FAX / FAX TO EMAIL SERVICE (OPTIONAL)” from this link https://ictfax.org/content/ictfax-installation-guide
echo "ictcore" >> /etc/mail/trusted-users
echo "apache" >> /etc/mail/trusted-users
echo "FAX_DOMAIN.COM" >> /etc/mail/local-host-names
echo '@FAX_DOMAIN.COM ictcore' >> /etc/mail/virtusertable
To apply email related changes
/etc/mail/make
Restart sendmail service so changes can take affect
chkconfig sendmail on
service sendmail restart
in case if document not uploading then install “libtiff-tools” package
yum install libtiff-tools -y
Restart freeswitch with service
ps -A | grep freeswitch
19892 freeswitch
kill -9 19892
enter into freeswitch
fs_cli
Additional Configuration
if freeswitch is not starting then update following below
update listen_ip with 0.0.0.0 in /etc/freeswitch/autoload_configs/event_socket.conf.xml
if you want to restart freeswitch by service command then run the following scripts and services;
cat <<EOF | sudo tee /etc/systemd/system/freeswitch.service
[Unit]
Description=freeswitch
Wants=network-online.target
Requires=network.target local-fs.target
After=network.target network-online.target local-fs.target

[Service]
; service
Type=forking
Environment="DAEMON_OPTS=-nonat"
EnvironmentFile=-/etc/default/freeswitch
ExecStart=/usr/bin/freeswitch -ncwait ${DAEMON_OPTS}
RestartSec=90
Restart=always
; exec
;User=root
;Group=daemon
LimitCORE=infinity
LimitNOFILE=100000
LimitNPROC=60000
LimitSTACK=250000
LimitRTPRIO=infinity
LimitRTTIME=infinity
IOSchedulingClass=realtime
IOSchedulingPriority=2
CPUSchedulingPolicy=rr
CPUSchedulingPriority=89
UMask=0007
NoNewPrivileges=false

[Install]
WantedBy=multi-user.target
EOF
sudo systemctl daemon-reload
sudo systemctl start freeswitch
sudo systemctl enable freeswitch
Install SSL Certificate
To add the CentOS 8 EPEL repository, run the following command:
yum install epel-release
Now that you have access to the repository, install all of the required packages:
yum install certbot python3-certbot-apache mod_ssl
Add VirtualHost in httpd.conf file
vi /etc/httpd/conf/httpd.conf
then add following lines in httpd.conf file
<VirtualHost *:80>
DocumentRoot "/usr/ictfax"
ServerName yourdomain.com
</VirtualHost>
restart Apache service
service httpd restart
Now that Certbot is installed, you can use it to request an SSL certificate for your domain.
certbot --apache
Install ICTFax Version 6.0
Please follow the steps below to install the ICTFax latest version 6.0
Install the MariaDB 10.11Create mariadb 10.11 repo. Add the following code into this file vi /etc/yum.repos.d/MariaDB.repo
[mariadb]
name = MariaDB
baseurl = http://yum.mariadb.org/10.11/rhel8-amd64
gpgkey=https://yum.mariadb.org/RPM-GPG-KEY-MariaDB
gpgcheck=1
Install required dependencies
sudo dnf install perl-DBI boost-program-options socat -y
sudo dnf install boost boost-program-options -y
Install the MariaDB
sudo dnf install MariaDB-server MariaDB-client --disablerepo='*' --enablerepo='mariadb' -y
Install Remi-repo & Epel-repo
sudo dnf install epel-release -y
yum install dnf-utils http://rpms.remirepo.net/enterprise/remi-release-8.rpm
Enable the PHP Remi 8.3
sudo yum module reset php -y
sudo yum module enable php:remi-8.3 -y
Install the Okey repository for FreeSWITCH from this link
rpm -ivh http://repo.okay.com.mx/centos/8/x86_64/release/okay-release-1-5.el8.noarch.rpm
Install ICT-Release Repo for install ICTCore and ICTFax
yum install https://service.ictinnovations.com/repo/8/ict-release-8-5.el8.noarch.rpm
Install ICTCore
yum install ictcore ictcore-fax ictcore-email ictcore-voice ictcore-freeswitch
Install ICTFax
yum install ictfax
Install Other Dependencies
yum install php php-fpm php-gd php-mysqlndInstall Imagicyum install -y ImageMagick ImageMagick-devel pecl install imagickif pecl command giving error then use:sudo yum install -y php-imagick echo "extension=imagick.so" > /etc/php.d/imagick.iniInstall mcryptyum install --enablerepo=epel php-devel php-pear libmcrypt libmcrypt-devel pecl install mcrypt echo 'extension=mcrypt.so' > /etc/php.d/mcrypt.iniInstall imapyum install php-imap -y
Configure the document root in apache “/usr/ictfax”
Uncomment “LoadModule mpm_prefork_module modules/mod_mpm_prefork.so” and comment this line “LoadModule mpm_event_module modules/mod_mpm_event.so” from this file /etc/httpd/conf.modules.d/00-mpm.conf
Change PHP_ADMIN_VALUE open_basedir line into /etc/httpd/conf.d/ictcore.conf
SetEnv PHP_ADMIN_VALUE "open_basedir = /usr/ictcore/:/usr/bin:/bin:/tmp/"
Disable selinux
setenforce 0
Restart the apache service
Restart php-fpm service
service httpd restart
service php-fpm restart
Install the ictfax database
CREATE DATABASE ictfax;
USE ictfax;
GRANT ALL PRIVILEGES ON ictfax.* TO ictfaxuser@localhost IDENTIFIED BY 'plsChangeIt';
FLUSH PRIVILEGES;

source /usr/ictcore/db/database.sql;
source /usr/ictcore/db/email.sql;
source /usr/ictcore/db/fax.sql;
source /usr/ictcore/db/ictfax.sql;
source /usr/ictcore/db/voice.sql;
source /usr/ictcore/db/data/role_user.sql;
source /usr/ictcore/db/data/role_admin.sql;
source /usr/ictcore/db/data/demo_users.sql;
exit;
Open the file /etc/ictcore.conf and find out the [db] section and replace user, password and database name in the following lines:
user = ictfaxuser
pass = plsChangeIt
name = ictfax
cd /usr/ictcore/bin/sendmail
./email_to_fax
Now visit http://yourdomain/ictfax
Default Username: admin@ictcore.org
Default Password: helloAdmin
Log in by entering the default admin and password, which we provided you. Go to the administration panel, which is placed on the bottom of the side bar on left. Create a new user or edit the existing.
You can configure providers and accounts too. For further details visit Admin guide.
Configure the email-2-fax and fax-2-service, following the guide “4. EMAIL TO FAX / FAX TO EMAIL SERVICE (OPTIONAL)” from this link https://ictfax.org/content/ictfax-installation-guide
echo "ictcore" >> /etc/mail/trusted-users
echo "apache" >> /etc/mail/trusted-users
echo "FAX_DOMAIN.COM" >> /etc/mail/local-host-names
echo '@FAX_DOMAIN.COM ictcore' >> /etc/mail/virtusertable
To apply email related changes
/etc/mail/make
Restart sendmail service so changes can take affect
chkconfig sendmail on
service sendmail restart
in case if document not uploading then install “libtiff-tools” package
yum install libtiff-tools -y
Restart freeswitch with service
ps -A | grep freeswitch
19892 freeswitch
kill -9 19892
enter into freeswitch
fs_cli
Additional Configuration
if freeswitch is not starting then update following below
update listen_ip with 0.0.0.0 in /etc/freeswitch/autoload_configs/event_socket.conf.xml
if you want to restart freeswitch by service command then run the following scripts and services;
cat <<EOF | sudo tee /etc/systemd/system/freeswitch.service
[Unit]
Description=freeswitch
Wants=network-online.target
Requires=network.target local-fs.target
After=network.target network-online.target local-fs.target

[Service]
; service
Type=forking
Environment="DAEMON_OPTS=-nonat"
EnvironmentFile=-/etc/default/freeswitch
ExecStart=/usr/bin/freeswitch -ncwait ${DAEMON_OPTS}
RestartSec=90
Restart=always
; exec
;User=root
;Group=daemon
LimitCORE=infinity
LimitNOFILE=100000
LimitNPROC=60000
LimitSTACK=250000
LimitRTPRIO=infinity
LimitRTTIME=infinity
IOSchedulingClass=realtime
IOSchedulingPriority=2
CPUSchedulingPolicy=rr
CPUSchedulingPriority=89
UMask=0007
NoNewPrivileges=false

[Install]
WantedBy=multi-user.target
EOF
sudo systemctl daemon-reload
sudo systemctl start freeswitch
sudo systemctl enable freeswitch
Install SSL Certificate
To add the CentOS 8 EPEL repository, run the following command:
yum install epel-release
Now that you have access to the repository, install all of the required packages:
yum install certbot python3-certbot-apache mod_ssl
Add VirtualHost in httpd.conf file
vi /etc/httpd/conf/httpd.conf
then add following lines in httpd.conf file
<VirtualHost *:80>
DocumentRoot "/usr/ictfax"
ServerName yourdomain.com
</VirtualHost>
restart Apache service
service httpd restart
Now that Certbot is installed, you can use it to request an SSL certificate for your domain.
certbot --apache
Install ICTFax Version 5.0
Please follow the steps below to install the ICTFax version 5.0
To install above requirements, first of all we need to install their respective repositories
yum install -y https://service.ictinnovations.com/repo/7/ict-release-7-4.el7.centos.noarch.rpm
sudo amazon-linux-extras install epel -y
SignalWire Personal Access Tokens (PAT)s are required to access FreeSWITCH install packages.
click the below link and follow the steps to create signalwire account and add personal access token. after this replace your signalwire username and personal access token in below first and second commands respectively.
How To Create a SignalWire Personal Access Token
echo "signalwire" > /etc/yum/vars/signalwireusername
echo "TOKEN" > /etc/yum/vars/signalwiretoken
yum install -y https://$(< /etc/yum/vars/signalwireusername):$(< /etc/yum/vars/signalwiretoken)@freeswitch.signalwire.com/repo/yum/centos-release/freeswitch-release-repo-0-1.noarch.rpm epel-release
Disable SELinux, before proceeding further, Check the SELinux state by:
getenforce
and then disable with
setenforce 0
If the output is either permissive or disabled, skip this task and follow the instructions given below, otherwise disable it first and then follow the instructions:
2. ICTCore Installation
ICTCore is main dependency of ICTFax, If you have proper repositories pre installed (see above) then all other dependencies will be installed along with ICTCore. We just need to issue following command:
yum -y install ictcore ictcore-fax ictcore-email ictcore-voice
Setup ICTFax Database
Login to mysql and enter these commands one by one:
CREATE DATABASE ictfax;
USE ictfax;
GRANT ALL PRIVILEGES ON ictfax.* TO ictfaxuser@localhost IDENTIFIED BY 'plsChangeIt';
FLUSH PRIVILEGES;
SOURCE /usr/ictcore/db/database.sql;
SOURCE /usr/ictcore/db/fax.sql;
SOURCE /usr/ictcore/db/email.sql;
SOURCE /usr/ictcore/db/voice.sql;
SOURCE /usr/ictcore/db/data/role_user.sql;
SOURCE /usr/ictcore/db/data/role_admin.sql;
SOURCE /usr/ictcore/db/data/demo_users.sql;
Now update /usr/ictcore/etc/ictcore.conf files with database credential as per above created database.
Open the file ictcore.conf and find out the [db] section and replace user, password and database name in the following lines:
user = ictfaxuser
pass = plsChangeIt
name = ictfax
3. ICTFax Installation
Now install ICTFax web interface
yum install ictfax
configure the document root in apache “/usr/ictfax”
open the apache configuration file /etc/httpd/conf/httpd.conf and then search for document root. replace existing document /usr/ictbroadcast/wwwroot to /usr/ictfax and save the file.
Now Restart the apache by typing the following command in the terminal
service httpd restart
Now visit http://yourdomain/ictfax
Default Username: admin@ictcore.org
Default Password: helloAdmin
Log in by entering the default admin and password, which we provided you. Go to the administration panel, which is placed on the bottom of the side bar on left. Create a new user or edit the existing.
You can configure providers and accounts too. For further details visit Admin guide.
4. Email to Fax / Fax to Email service (optional)
make sure that your desired domain’s MX records are properly configured for email2fax server.
enable sendmail to listen on public ip address look for following line in /etc/mail/sendmail.mc
DAEMON_OPTIONS(`Port=smtp,Addr=127.0.0.1, Name=MTA')dnl
and change line mentioned above into
DAEMON_OPTIONS(`Port=smtp, Addr=0.0.0.0, Name=MTA')dnl
Add ictcore and apache to list of trusted user
echo "ictcore" >> /etc/mail/trusted-users
echo "apache" >> /etc/mail/trusted-users
Add your domain name in allowed local domain list to let sendmail receive mails for that domain
echo "FAX_DOMAIN.COM" >> /etc/mail/local-host-names
route all mails for none-existing addresses into ictcore mailbox so we can receive emails for addresses like xyz_number@FAX_DOMAIN.COM
echo '@FAX_DOMAIN.COM ictcore' >> /etc/mail/virtusertable
to apply email related changes
/etc/mail/make
restart sendmail service so changes can take affect
chkconfig sendmail on
service sendmail restart
edit /usr/ictcore/etc/ictcore.conf and update mailbox section like following
folder = /var/spool/email/ictcore
NOTE: make sure that port (25) is not blocked by firewall. if so execute following line to allow smtp port in firewall:
/sbin/iptables -I INPUT -p tcp -m state --state NEW -m tcp --dport 25 -j ACCEPT    # smtp
/etc/init.d/iptables save
Check dialplan table from MySQL, run following command. if nothing in dialplan table
cd /usr/ictcore/bin/sendmail
./email_to_fax
Now you are ready to send faxes through your email. See Admin / User Guide for further details.
Install SSL Certificate
Install following package in Server
yum-config-manager --enable rhui-REGION-rhel-server-extras rhui-REGION-rhel-server-optional
yum install certbot python2-certbot-apache
Add VirtualHost in httpd.conf file
vi /etc/httpd/conf/httpd.conf
then add following lines in httpd.conf file
<VirtualHost *:80>DocumentRoot “/usr/ictfax”
ServerName yourdomain.com
</VirtualHost>
restart Apache service
service httpd restart
Now that Certbot is installed, you can use it to request an SSL certificate for your domain.
certbot --apache
Install ICTFax Version 5.0
Please follow the steps below to install the ICTFax version 5.0
To install above requirements, first of all we need to install their respective repositories
yum install -y https://service.ictinnovations.com/repo/7/ict-release-7-4.el7.centos.noarch.rpm
yum install -y epel-release
SignalWire Personal Access Tokens (PAT)s are required to access FreeSWITCH install packages.
click the below link and follow the steps to create signalwire account and add personal access token. after this replace your signalwire username and personal access token in below first and second commands respectively.
How To Create a SignalWire Personal Access Token
echo "signalwire" > /etc/yum/vars/signalwireusername
echo "TOKEN" > /etc/yum/vars/signalwiretoken
yum install -y https://$(< /etc/yum/vars/signalwireusername):$(< /etc/yum/vars/signalwiretoken)@freeswitch.signalwire.com/repo/yum/centos-release/freeswitch-release-repo-0-1.noarch.rpm epel-release
Disable SELinux, before proceeding further, Check the SELinux state by:
getenforce
and then disable with
setenforce 0
If the output is either permissive or disabled, skip this task and follow the instructions given below, otherwise disable it first and then follow the instructions:
2. ICTCore Installation
ICTCore is main dependency of ICTFax, If you have proper repositories pre installed (see above) then all other dependencies will be installed along with ICTCore. We just need to issue following command:
yum -y install ictcore ictcore-fax ictcore-email ictcore-voice
Setup ICTFax Database
Login to mysql and enter these commands one by one:
CREATE DATABASE ictfax;
USE ictfax;
GRANT ALL PRIVILEGES ON ictfax.* TO ictfaxuser@localhost IDENTIFIED BY 'plsChangeIt';
FLUSH PRIVILEGES;
SOURCE /usr/ictcore/db/database.sql;
SOURCE /usr/ictcore/db/fax.sql;
SOURCE /usr/ictcore/db/email.sql;
SOURCE /usr/ictcore/db/voice.sql;
SOURCE /usr/ictcore/db/data/role_user.sql;
SOURCE /usr/ictcore/db/data/role_admin.sql;
SOURCE /usr/ictcore/db/data/demo_users.sql;
Now update /usr/ictcore/etc/ictcore.conf files with database credential as per above created database.
Open the file ictcore.conf and find out the [db] section and replace user, password and database name in the following lines:
user = ictfaxuser
pass = plsChangeIt
name = ictfax
3. ICTFax Installation
Now install ICTFax web interface
yum install ictfax
and configure the document root in Apache “/usr/ictfax”
open the Apache configuration file /etc/httpd/conf/httpd.conf and then search for the document root. replace existing document /usr/ictbroadcast/wwwroot to /usr/ictfax and save the file.
Now Restart the Apache by typing the following command in the terminal
service httpd restart
Now visit http://yourdomain/ictfax
Default Username: admin@ictcore.org
Default Password: helloAdmin
Log in by entering the default admin and password, which we provided you. Go to the administration panel, which is placed on the bottom of the side bar on left. Create a new user or edit the existing.
You can configure providers and accounts too. For further details visit Admin guide.
4. Email to Fax / Fax to Email service (optional)
make sure that your desired domain’s MX records are properly configured for email2fax server.
enable sendmail to listen on public ip address look for following line in /etc/mail/sendmail.mc
DAEMON_OPTIONS(`Port=smtp,Addr=127.0.0.1, Name=MTA')dnl
and change line mentioned above into
DAEMON_OPTIONS(`Port=smtp, Addr=0.0.0.0, Name=MTA')dnl
Add ictcore and apache to list of trusted user
echo "ictcore" >> /etc/mail/trusted-users
echo "apache" >> /etc/mail/trusted-users
Add your domain name in allowed local domain list to let sendmail receive mails for that domain
echo "FAX_DOMAIN.COM" >> /etc/mail/local-host-names
route all mails for none-existing addresses into ictcore mailbox so we can receive emails for addresses like xyz_number@FAX_DOMAIN.COM
echo '@FAX_DOMAIN.COM ictcore' >> /etc/mail/virtusertable
to apply email related changes
/etc/mail/make
restart sendmail service so changes can take affect
chkconfig sendmail on
service sendmail restart
edit /usr/ictcore/etc/ictcore.conf and update mailbox section like following
folder = /var/spool/email/ictcore
NOTE: make sure that port (25) is not blocked by firewall. if so execute following line to allow smtp port in firewall:
/sbin/iptables -I INPUT -p tcp -m state --state NEW -m tcp --dport 25 -j ACCEPT    # smtp
/etc/init.d/iptables save
Check dialplan table from MySQL, run following command. if nothing in dialplan table
cd /usr/ictcore/bin/sendmail
./email_to_fax
Now you are ready to send faxes through your email. See Admin / User Guide for further details.
Install SSL Certificate
Install following package in Server
yum-config-manager --enable rhui-REGION-rhel-server-extras rhui-REGION-rhel-server-optional
yum install certbot python2-certbot-apache
Add VirtualHost in httpd.conf file
vi /etc/httpd/conf/httpd.conf
then add following lines in httpd.conf file
<VirtualHost *:80>DocumentRoot “/usr/ictfax”
ServerName yourdomain.com
</VirtualHost>
restart Apache service
service httpd restart
Now that Certbot is installed, you can use it to request an SSL certificate for your domain.
certbot --apache
Step 1: Visit the below link to Install Docker According to Required OS
https://docs.docker.com/engine/install/
- Restart the docker service
service docker restart
- Pull the repo from dockerhub
docker pull ictinnovations/ictfax
- Create the container out of image
docker run -d --name ictcontainer -p 80:80 -p 443:443 -p 3306:3306 docker.io/ictinnovations/ictfax tail -f /bin/bash
- Checking the running container id and status
docker ps -a
- Enter/Attached into container
docker exec --privileged -it container_id /bin/bash
Step 2: Run following commands after Enter into container Image
- Replace Document root to /usr/ictfax in vi /etc/httpd/conf/httpd.conf
- Change PHP_ADMIN_VALUE open_basedir line into /etc/httpd/conf.d/ictcore.conf
SetEnv PHP_ADMIN_VALUE "open_basedir = /usr/ictcore/:/usr/bin:/bin:/tmp/"
- Restart apache
/usr/sbin/httpd -k start
or
service httpd restart
- Restart php-fpm
/usr/sbin/php-fpm
or
Service php-fpm restart
- Run following commands for properly configuration of mariadb
Create mysql.sock file in /var/lib/mysql
vi /var/lib/mysql/mysql.sock
Add following lines in /etc/my.cnf
[mysqld]
#mysqli.allow_local_infile=ON
event-scheduler=ON
datadir=/var/lib/mysql
socket=/var/lib/mysql/mysql.sock
- Restart mysql/mariadb service
service mysqld restart
or
/usr/bin/mysqld_safe --datadir='/var/lib/mysql' --user=mysql &
Disable selinux
setenforce 0
install the ictfax database
CREATE DATABASE ictfax;
USE ictfax;
GRANT ALL PRIVILEGES ON ictfax.* TO ictfaxuser@localhost IDENTIFIED BY 'plsChangeIt';
FLUSH PRIVILEGES;

source /usr/ictcore/db/database.sql;
source /usr/ictcore/db/email.sql;
source /usr/ictcore/db/fax.sql;
source /usr/ictcore/db/ictfax.sql;
source /usr/ictcore/db/voice.sql;
source /usr/ictcore/db/data/role_user.sql;
source /usr/ictcore/db/data/role_admin.sql;
source /usr/ictcore/db/data/demo_users.sql;
exit;
Open the file /etc/ictcore.conf and find out the [db] section and replace user, password and database name in the following lines:
user = ictfaxuser
pass = plsChangeIt
name = ictfax
cd /usr/ictcore/bin/sendmail
./email_to_fax
Now visit http://yourdomain/ictfax
Default Username: admin@ictcore.org
Default Password: helloAdmin
Log in by entering the default admin and password, which we provided you. Go to the administration panel, which is placed on the bottom of the side bar on left. Create a new user or edit the existing.
You can configure providers and accounts too. For further details visit Admin guide.
Configure the email-2-fax and fax-2-service, following the guide "4. EMAIL TO FAX / FAX TO EMAIL SERVICE (OPTIONAL)" from this link https://ictfax.org/content/ictfax-installation-guide
echo "ictcore" >> /etc/mail/trusted-users
echo "apache" >> /etc/mail/trusted-users

echo "FAX_DOMAIN.COM" >> /etc/mail/local-host-names

echo '@FAX_DOMAIN.COM ictcore' >> /etc/mail/virtusertable
To apply email related changes
/etc/mail/make
Restart sendmail service so changes can take affect
chkconfig sendmail on
service sendmail restart
in case if document not uploading then install "libtiff-tools" package
yum install libtiff-tools -y
Restart freeswitch service
ps -A | grep freeswitch

19892 freeswitch

kill -9 19892

freeswitch -nc
enter into freeswitch
fs_cli
Additional Configuration
if freeswitch is not starting then update following below
update listen_ip with 0.0.0.0 in /etc/freeswitch/autoload_configs/event_socket.conf.xml
if you want to restart freeswitch by service command then run the following scripts and services;
cat <<EOF | sudo tee /etc/systemd/system/freeswitch.service
[Unit]
Description=freeswitch
Wants=network-online.target
Requires=network.target local-fs.target
After=network.target network-online.target local-fs.target

[Service]
; service
Type=forking
Environment="DAEMON_OPTS=-nonat"
EnvironmentFile=-/etc/default/freeswitch
ExecStart=/usr/bin/freeswitch -ncwait ${DAEMON_OPTS}
RestartSec=90
Restart=always
; exec
;User=root
;Group=daemon
LimitCORE=infinity
LimitNOFILE=100000
LimitNPROC=60000
LimitSTACK=250000
LimitRTPRIO=infinity
LimitRTTIME=infinity
IOSchedulingClass=realtime
IOSchedulingPriority=2
CPUSchedulingPolicy=rr
CPUSchedulingPriority=89
UMask=0007
NoNewPrivileges=false

[Install]
WantedBy=multi-user.target
EOF
sudo systemctl daemon-reload
sudo systemctl start freeswitch
sudo systemctl enable freeswitch
First Fax
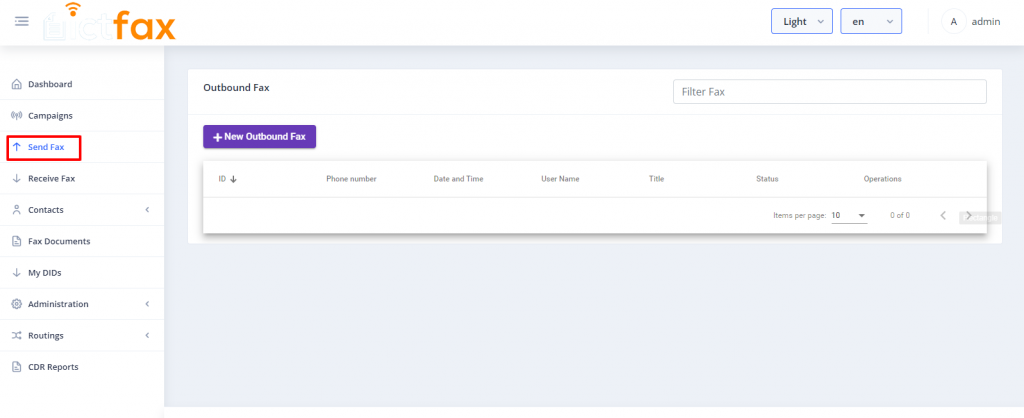
Sending First FAX
- Login as admin
- Add gateway / trunk for outgoing fax at “Administration” => “Provider Trunks”
- Send new fax via “Send Fax” => “New Outbound Fax” or via email2fax
- From user registration email address send an email with following values
- To: faxnumber@FAX_DOMAIN.COM
- Subject: Anything
- Body:
- Attachment: pdf file
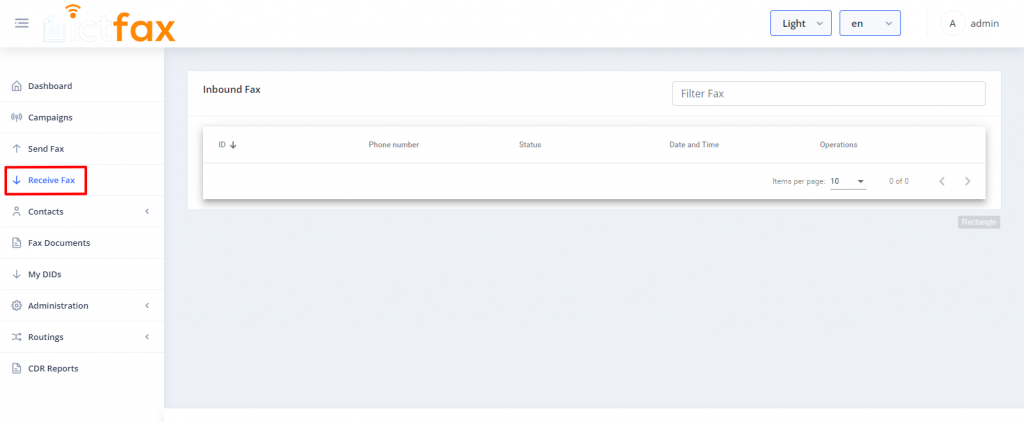
Receiving First FAX
- Point DIDs to fax server
- Configure freeswitch to receive traffic for this DID provider.
- Usually only IP address of the DID provider is sufficient to be added in ACL.
- In Web GUI login as admin
- Add incoming did number at “DID Numbers” => “Add DID”
- Assign a DID number to user from “DID Number” => “Assign”
- Click on “Settings” => “Incoming Numbers”
- Forward fax by selecting “Forward” and select “Fax to Email”
- Send test fax to selected did
Useful links
Starting with REST APIs for FAX Starting with REST APIs for FAX
Complete REST API Guide for ICTFax Complete REST API Guide for ICTFax